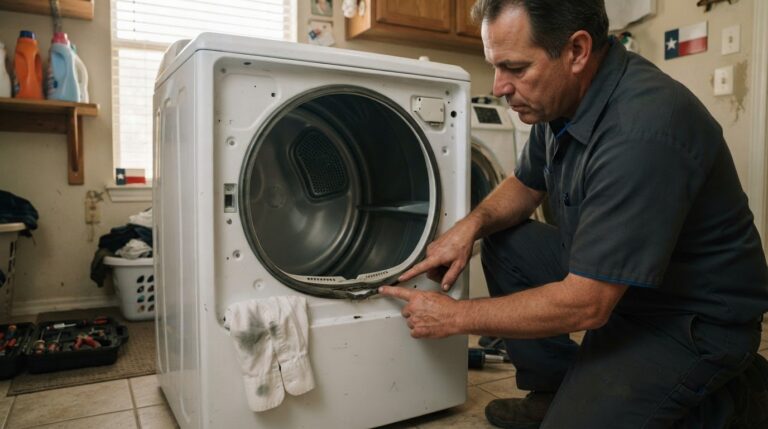
Black marks on collars and cuffs can point to a problem inside the dryer. If your dryer leaves black marks on clothes in Fulshear, worn drum felt seals or glides may let clothing get pinched as the drum turns. Cracks or damage around the lint screen can also snag fabric and leave marks.
It’s frustrating to pull laundry from the dryer and find dark smudges, especially when they keep appearing in the same places. The marks’ location and pattern can help narrow down the cause, but the parts need careful inspection to identify it. This guide explains how clothing can catch between the drum and dryer housing, what to look for around the lint screen, and which components a repair technician may inspect. You’ll know what details to share when arranging dryer repair and what the process may involve.
Key Takeaways
- Marks on collars and cuffs can help point to clothing rubbing or getting pinched as the drum turns.
- Worn felt seals or drum glides may let the drum lift and trap fabric against the dryer housing.
- Inspecting the lint screen area can reveal cracks or damage that may snag clothes during a cycle.
- A repair professional can examine the drum supports, seals, baffles, and lint screen housing to locate the source.
- Note where the marks appear and share that pattern when arranging dryer repair.
Worn drum felt seals and clothes getting pinched
Ask a repair technician to inspect the drum supports if black marks appear. A worn seal, glide, roller, or baffle can let fabric rub or get trapped.
-
How a professional inspects the drum felt seals
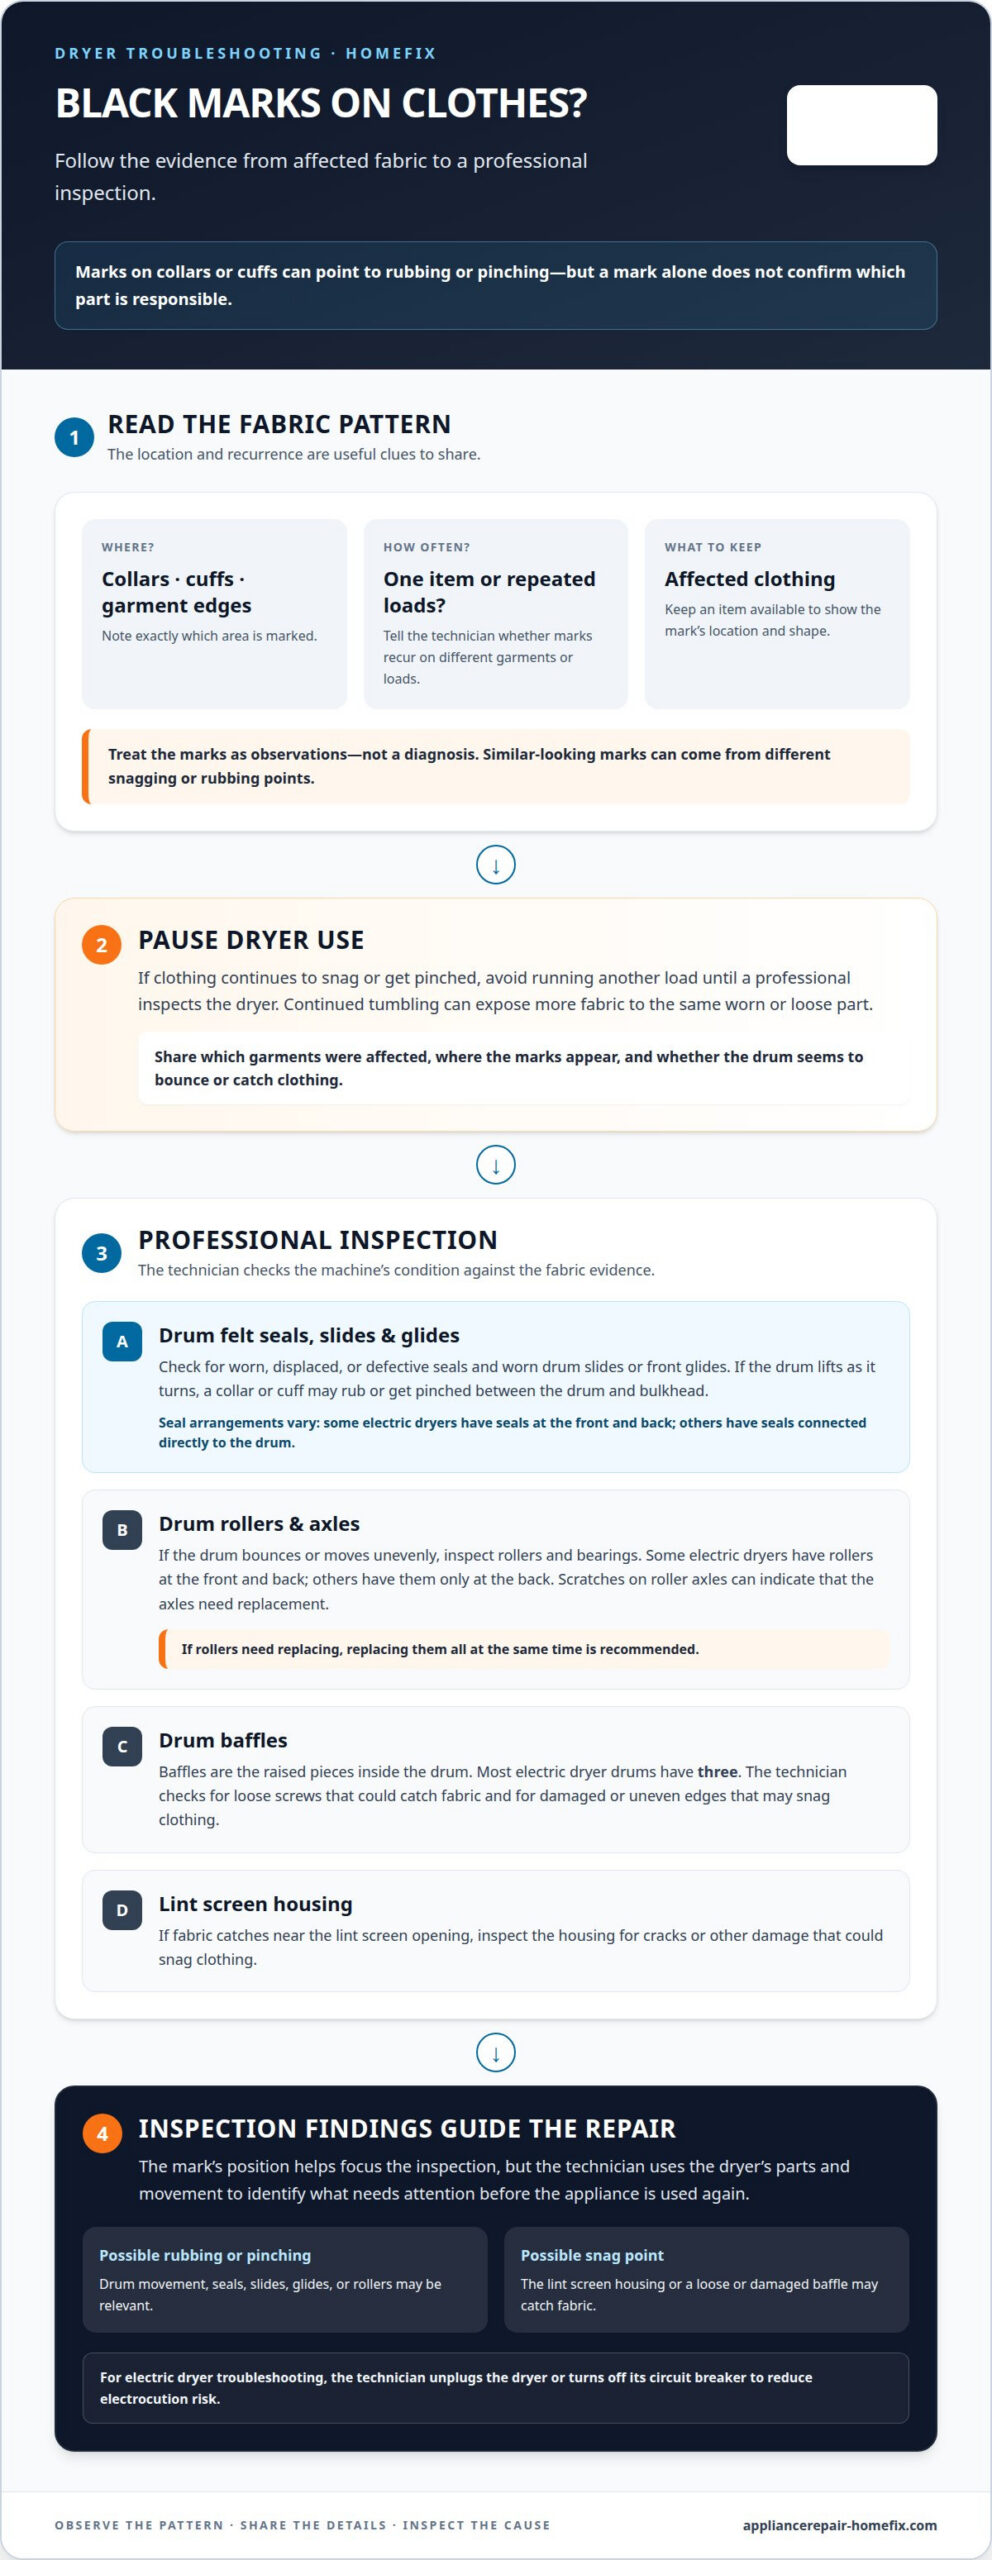
Arrange a professional inspection if clothing appears pinched or marked after a cycle. The technician checks whether the felt seal is worn, displaced, or defective, and whether the drum lifts as it turns. A gap can let a collar or cuff catch between the drum and bulkhead, leaving a dark mark. Some electric dryers have felt seals at the front and back; others have seals connected directly to the drum.
-
How a professional inspects the drum slides
Have the technician check the drum slides and front glides for wear that could let the drum shift out of position. If the drum lifts as it turns, fabric can rub between the drum and slides or get pinched against the bulkhead. This friction can leave black marks, especially where a garment’s edge catches. Worn slides or a mispositioned felt seal need repair, not another laundry cycle.
- Ask the technician to assess the drum rollers if the drum bounces during rotation. Failed roller bearings can make the drum move unevenly and press clothing against the bulkhead. Some electric dryers have rollers at both the front and back; others have them only at the back. The technician identifies the dryer’s arrangement before deciding what needs replacement. If rollers need replacing, replacing them all at the same time is recommended. Scratches on the roller axles can also indicate that the axles need replacement.
- Request an inspection of the drum baffles, the raised pieces mounted inside the drum. Most electric dryer drums have three baffles. Loose screws can catch fabric as the drum turns and leave marks, so the technician checks whether the screws have loosened and tightens them when needed. A loose baffle may create a snag point distinct from pinching at the drum edge. Damaged baffles also deserve attention because clothing can catch on an uneven edge.
- Tell the technician where the marks appear and whether the drum seems to bounce or catch clothing. These details help focus the inspection on seals, slides, glides, rollers, axles, and baffles. Before troubleshooting an electric dryer, the technician unplugs it or turns off its circuit breaker to reduce electrocution risk. Avoid running another load if clothing continues to snag or get pinched. Continued tumbling can expose more fabric to the same worn or loose part.
Black marks on collars and cuffs
Black marks from a dryer are often most noticeable on shirt or blouse collars and cuffs. Stop using the dryer until a professional inspects it, since another cycle can expose more clothing to the same snag or rubbing point.
- Note which garment areas have marks before arranging an inspection. Compare a shirt collar with its cuffs, or check whether several garments have marks along their edges. This pattern gives the technician useful clues about where fabric may rub or catch during rotation. Keep an affected item available to show the location and shape of the marks.
- Describe when the marks appear and whether they recur on different loads. For example, tell the technician if a blouse cuff was marked after drying and another garment’s collar showed marks later. Repeated marks on exposed edges can focus attention on where fabric shifts near the drum opening. Don’t assume the laundry itself is the cause.
- Ask the technician to inspect the drum opening and the parts that support its movement. A collar or cuff can rub against the drum slides or get pinched if the drum lifts while turning. Worn felt seals and front glides can contribute to that movement. The technician can compare the marked areas with wear, gaps, or movement around the drum.
- Have the technician check for other snag points, too. A damaged lint screen housing can catch clothing, while loose baffle screws can snag fabric inside the drum. These causes may leave marks in different places, so the technician considers the garment pattern alongside the condition of each part. A visible mark alone doesn’t identify which component needs repair.
- Share the affected garments and your description of the cycles with the professional. Mention whether marks are isolated to collars and cuffs or appear elsewhere, and whether the problem continues across loads. Arrange a professional dryer inspection before using the machine again. The inspection can identify whether rubbing, pinching, or a snagging surface is marking the fabric.
Treat the position of each mark as an observation to share, not a diagnosis. A collar or cuff rubbing against the dryer drum slides is one possible explanation for black marks, but the fabric’s appearance alone can’t confirm the cause. Tell the technician which edge is affected and whether the same location is marked on more than one item. Specific details can help distinguish a repeated pattern from marks in different places.
Until the inspection, leave the dryer unused and keep the affected clothing available for comparison. If more than one item is marked, show how the marks sit on each garment and explain which load they came from, if you know. Ask the technician to check whether the drum and slides could account for the rubbing, while also considering the other snag points described above. The goal is to connect the fabric evidence with the machine’s condition, not to select a part based on appearance alone. Use the inspection findings to decide what needs attention before using the dryer again.
Cracked or damaged lint screen housing
Ask a repair technician to inspect the lint screen housing if fabric catches or gets marked near its edges.
- Describe the snagging pattern before the inspection begins. Tell the technician whether clothing catches near the lint screen opening or shows marks after tumbling. A crack or other damage in the housing can snag fabric as the dryer runs. A clear description helps the technician focus on where clothing passes near the housing.
- Have the technician examine the housing around the lint screen opening for cracks, rough edges, or other damage. The lint screen itself may look intact while a spot in the surrounding housing catches fabric. The technician checks the whole opening, not just the visible screen, because the housing can snag clothing.
- Ask the technician to compare the damaged area with the clothing marks. A small crack or rough edge can catch fabric during rotation and leave a dark mark. If marks appear on a sleeve or hem, the technician can consider whether that part of the garment may have contacted the housing. The mark’s location is a clue, but it doesn’t prove the housing caused it.
- Have the technician distinguish housing damage from other snag points. A baffle inside the drum can catch loose fabric, while worn drum supports can let clothes rub near the drum opening. The technician considers these parts alongside the lint screen housing. This comparison helps determine whether one damaged edge explains the snag or another component needs attention.
- Ask the technician to explain the housing’s condition before repair begins. The technician can show where a crack, damaged surface, or snag point meets the clothing path. That finding helps determine whether the housing needs repair or replacement. Don’t treat recurring marks as laundry stains if garments keep catching in the same area.
- Keep the dryer out of use if the inspection finds a snagging edge. Continued tumbling can expose more garments to the damaged housing, especially items with loose hems or cuffs. A professional should address the faulty part before the appliance runs again. For an electric dryer, the technician unplugs it or turns off its circuit breaker before troubleshooting to reduce electrocution risk.
Cracks or other damage to the lint screen housing can snag clothing as the dryer runs and leave black marks. Keep affected garments available so the technician can compare the marks with the housing and see whether their locations align. Describe whether marks recur on the same garment areas, and distinguish black marks from fabric that is visibly caught or pulled. These observations can help focus the assessment without treating a mark alone as proof of the cause.
Before work begins, ask the technician to explain which part of the housing is damaged and whether it meets the clothing path. Confirm whether the recommended work is repair or replacement, and ask what needs attention before using the dryer again. If the housing isn’t identified as the snag point, ask which other component may explain the marks. Keep the dryer out of use until the identified fault is addressed, rather than risking further contact between clothing and a damaged edge.
Professional inspection and replacement of dryer components
Repair the dryer when an inspection identifies a specific faulty component that can be replaced. Consider replacing the appliance if the inspection finds damage beyond an isolated part.
-
Have a Professional Inspect Dryer Components
Arrange an inspection and describe when the marks appear, including which garments are affected. The technician examines the drum’s movement and checks the felt seals, slides, front glides, rollers, baffles, and lint screen housing. Each part is a possible contact point, so the inspection connects wear or damage with the path clothing takes through the dryer.
- Ask the technician to identify the fault before replacing parts. A shifted seal, damaged housing edge, or loose baffle calls for a different repair. The technician can compare the location of the wear with the clothing marks and explain which component is causing the snag or rubbing. This helps avoid replacing unrelated parts without addressing the source.
- Have the technician assess related parts if a support component has failed. For example, roller movement and axle condition matter if a roller bearing has failed. Scratched axles may also need replacement. If drum rollers need replacing, replacing them together is recommended. The technician can inspect the dryer’s setup and determine which associated components need attention.
-
Choose Repair or Replacement
Ask the technician to compare the confirmed fault with the dryer’s overall condition. Repair is appropriate when the problem traces to a specific part, such as a worn felt seal or cracked lint screen housing. Replacement may be the practical option if the inspection finds broader damage that an isolated repair won’t resolve. Base the decision on the diagnosed condition, not black marks alone.
- Request a clear explanation of the proposed repair before work begins. The technician should identify the affected part, describe how it can snag or pinch clothing, and explain how the replacement addresses the fault. If multiple components show wear, ask how each finding relates to the marks. This gives you a clear basis for weighing a focused repair against replacing the dryer.
- Keep an electric dryer off while a professional troubleshoots it. Unplugging it or turning off its circuit breaker reduces electrocution risk during inspection. After the repair, the technician can check that replaced parts are correctly positioned and no identified snag point remains. Share any continuing marks or fabric catches so the technician can account for those symptoms.
How can a dryer repair professional help address black marks left on clothes?
A repair professional can find and correct the dryer fault causing marks. Clothing care is separate: handle each marked garment according to its care label.
- Stop using the dryer and arrange a professional inspection before running another load. Repeated tumbling can expose more clothes to the same snag or rubbing point. Describe when the marks appeared and which items were affected. For example, tell the technician whether a shirt collar, blouse cuff, or several garment edges were marked after drying.
- Show the technician an affected garment, if available, and point out each mark. Its position can guide an inspection, but can’t identify the faulty part by itself. The technician assesses the dryer’s clothing path and checks for contact points that could catch or rub fabric. This helps distinguish a dryer problem from a mark that happened elsewhere.
- Ask the technician to explain the cause before repairing the appliance. A worn felt seal or front glide can let clothing get pinched; a damaged lint screen housing can snag fabric. Loose baffle screws and worn drum supports are other possible contact points. The technician connects the observed damage with how clothing moves through the drum.
- Have the technician address the identified faulty component, then assess whether related parts need attention. For example, failed drum roller bearings can cause the drum to bounce, and scratched axles may also need replacement. Replacing all rollers together is recommended when any rollers need replacing. The repair should address the mechanical cause, not just the visible mark on clothing.
- Keep marked garments separate while the dryer is inspected. Follow each item’s care label when deciding how to launder it, since fabric and garment instructions differ. Don’t put clothes into a dryer that continues to snag or mark them. Removing a mark from fabric won’t resolve an appliance fault, so address the cause before drying another load.
- Review the technician’s findings after the inspection. Ask which component caused the fabric contact, what repair was completed, and whether the dryer can run without the identified snag point. If marks continue after repair, report which garments are affected and when the marks appear. Those details help the technician assess the remaining issue without assuming every mark has the same cause.
Arrange a professional dryer inspection
HomeFix: Dryer Repair
HomeFix repairs dryers that leave clothing marked, snagged, or pinched. A technician can inspect the drum supports, felt seals, baffles, and lint screen housing to locate the fault. Share which garments were affected and where the marks appeared. That information helps focus the inspection on possible contact points and supports a clear repair recommendation.
If your dryer keeps marking clothes, contact HomeFix to arrange service.
Get Your Dryer Back to Caring for Clothes
If your dryer leaves black marks on clothes in Fulshear, treat them as a reason to address the appliance, not just the laundry. Note when they appear and which garments are affected. This gives the repair technician a useful starting point and helps connect the symptoms with the inspection findings.
HomeFix offers dryer, refrigerator, and washer repair. If marks or fabric snags keep recurring, arrange a professional assessment before running another load. A clear diagnosis can help you understand the repair needed and decide how to proceed.
Once the cause is addressed, you can get back to laundry with a clearer path forward.
Frequently Asked Questions
What causes a dryer to leave black marks on clothes?
Black marks can result from clothing rubbing against or catching on a damaged dryer part. Possible causes include worn drum seals or glides, a cracked lint screen housing, and loose baffle screws. Marks on a collar or cuff can help a technician understand where fabric may be contacting the machine. If your dryer leaves black marks on clothes in Fulshear, recurring marks call for an appliance inspection, not just stain treatment.
How can you tell whether black dryer marks come from a damaged drum seal or felt gasket?
You can’t confirm the cause from a stain alone; a technician needs to inspect the seal and drum movement. A worn, displaced, or defective felt seal may leave a gap where clothing can catch as the drum turns. Tell the technician whether marks recur on garment edges and whether fabric seems trapped. These observations help guide the inspection but aren’t proof of the cause.
Can worn drum rollers, glides, or bearings cause black marks on laundry?
Yes. Worn front glides can let the drum lift, while failed drum roller bearings can make it bounce as it turns. Either movement can press fabric against the dryer housing and potentially leave a mark. A technician also checks roller axles for scratches if rollers need replacing. Dryer roller arrangements vary, so the technician inspects the appliance before recommending parts.
How does a professional inspect and clean a dryer drum that is staining clothes?
A technician checks the drum and nearby parts for wear, damage, or snag points that could contact fabric. For an electric dryer, the technician unplugs it or turns off its circuit breaker before troubleshooting. If your dryer leaves black marks on clothes in Fulshear, share which items are affected and where the marks appear. The technician can clean residue appropriately, but cleaning alone won’t resolve a damaged component.